You’ve been on camera for three hours today, and every single time you glance at your own video feed, you wince. Dark shadows under your eyes. A weird glow from the window behind you. That unflattering overhead light that makes you look like you’re in a police interrogation.
Bad lighting doesn’t just make you look tired. It undermines your credibility, distracts your colleagues, and adds to the exhaustion that already comes with back-to-back virtual meetings.
The good news? You don’t need a film studio budget to look professional on camera. With a few strategic changes to your lighting setup, you can transform how you appear in every video call.
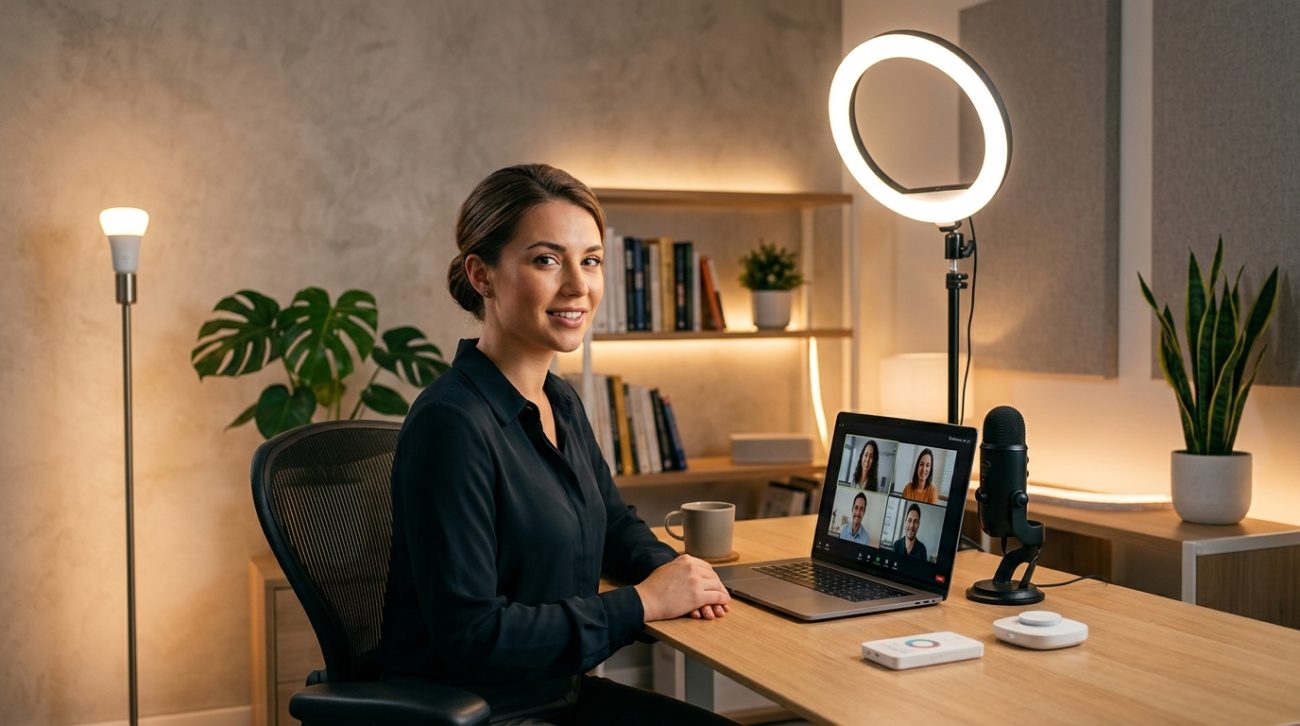
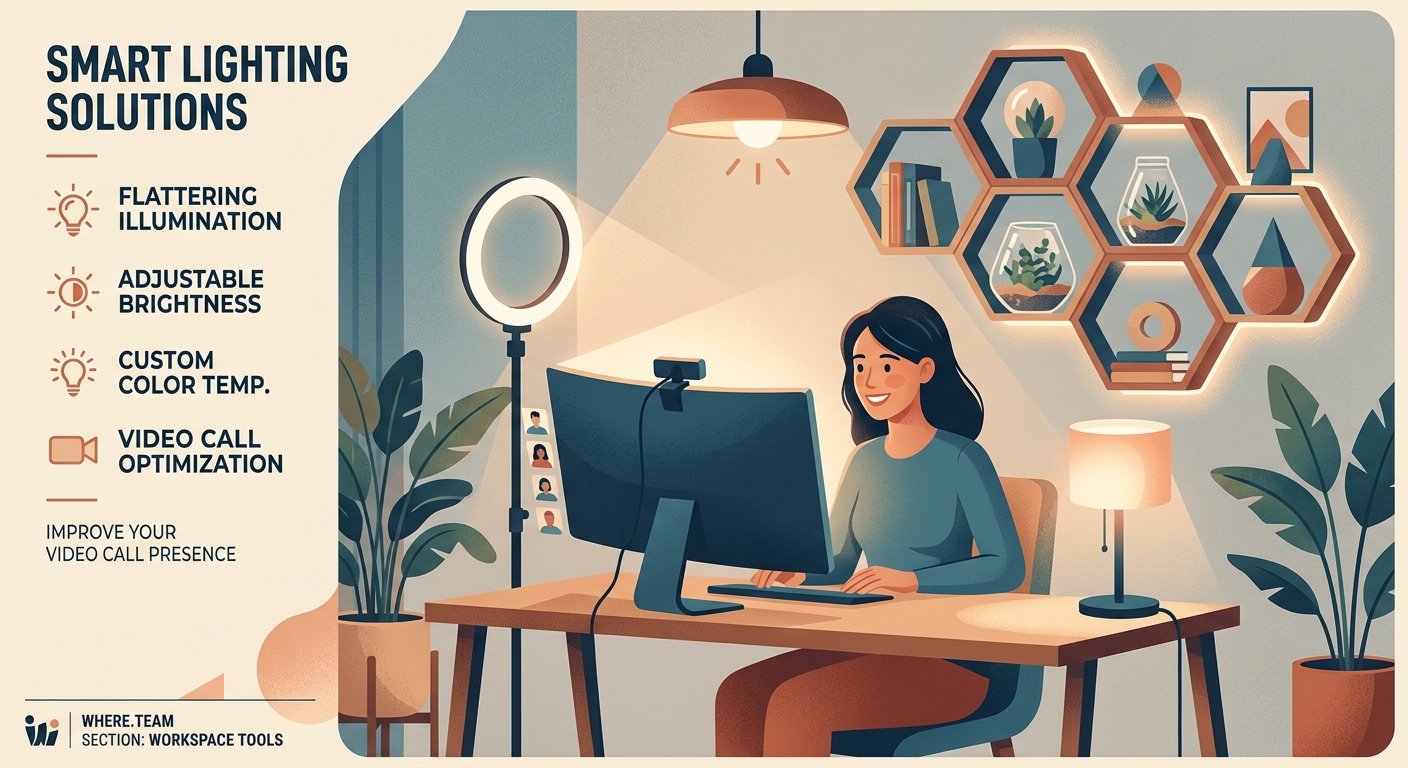
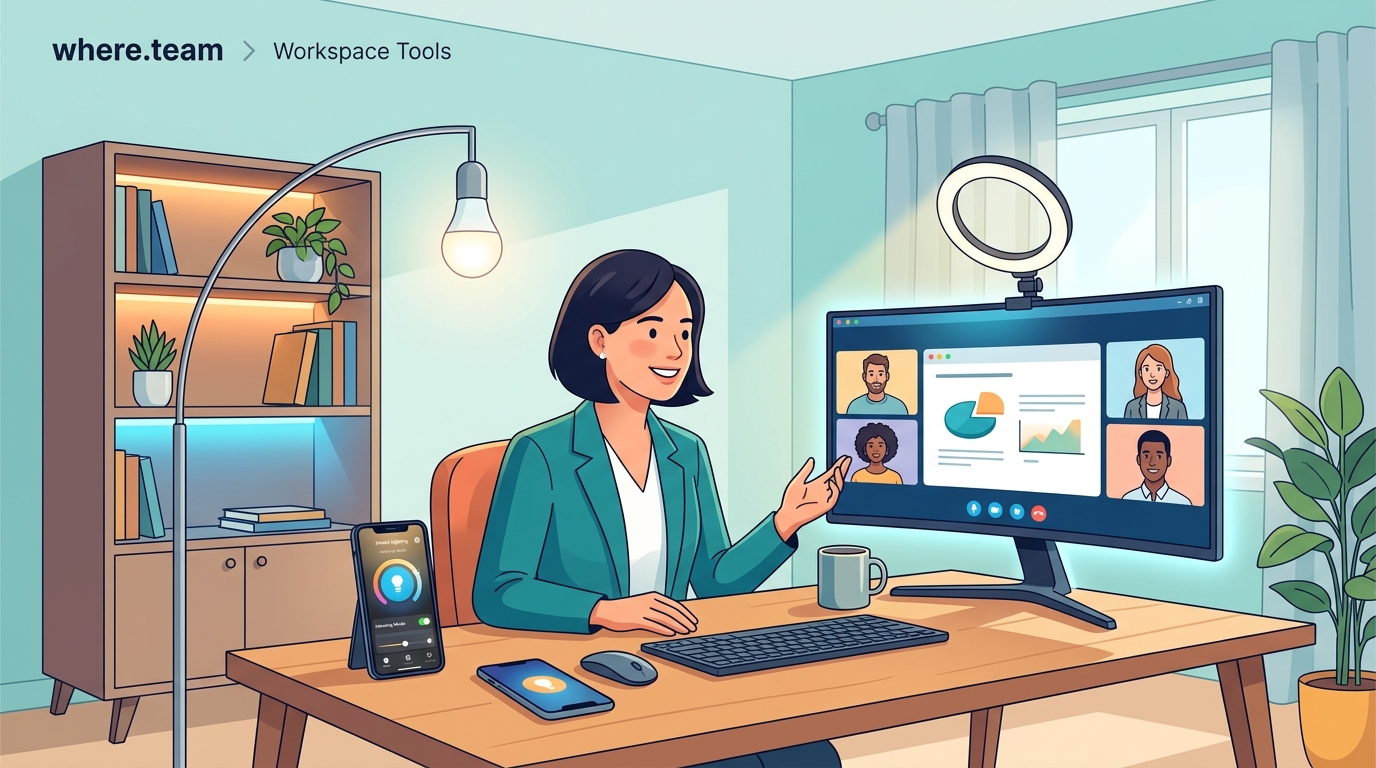
Proper lighting for video calls requires three elements: a key light positioned at eye level in front of you, elimination of harsh overhead or backlighting, and balanced color temperature around 5000K. Most professionals can achieve excellent results with a simple ring light or LED panel positioned 12 to 18 inches from their face, combined with natural light management and basic fill lighting to reduce shadows.
Why most home office lighting makes you look terrible on camera
Your ceiling light wasn’t designed for video calls. It was designed to illuminate your entire room from above.
That creates harsh shadows under your eyes, nose, and chin. You end up looking older, more tired, and less engaged than you actually are.
Windows create different problems. Light from behind turns you into a silhouette. Light from the side creates dramatic shadows that might work for a film noir detective but not for your client presentation.
Your laptop’s built-in camera makes everything worse. It sits below eye level, looking up at you from an unflattering angle while struggling to expose your face correctly in mixed lighting conditions.
The camera tries to balance the bright window behind you with your shadowed face. It usually fails, choosing to expose for the window and leaving your face in darkness.
The three-point lighting principle adapted for remote work
Professional videographers use three-point lighting: a key light, a fill light, and a backlight. You don’t need all three for video calls, but understanding the concept helps.
Your key light is the main source. It should be the brightest light hitting your face, positioned in front of you at roughly eye level or slightly above.
The fill light softens shadows created by the key light. It sits on the opposite side, at lower intensity.
The backlight separates you from your background. For video calls, this is optional, but it adds depth and polish.
Most remote workers can get excellent results with just a key light and basic fill, especially if they’re working with some natural light.
Setting up your key light for maximum impact
Position your primary light source directly in front of you, slightly above eye level. This mimics natural outdoor lighting and creates the most flattering shadows.
The light should be close enough to be effective but not so close that it creates glare or washes out your features. Start at 18 inches away and adjust from there.
Angle it about 30 to 45 degrees to one side of your camera. Dead-center lighting can look flat and medical. A slight angle adds dimension without creating dramatic shadows.
If you’re using a window as your key light, sit facing it. Morning or late afternoon light works better than harsh midday sun. Sheer curtains can diffuse direct sunlight beautifully.
For artificial lighting, LED panels or ring lights work well. Look for lights with adjustable brightness and color temperature so you can match your room’s ambient lighting.
Color temperature matters more than you think
Light has color, measured in Kelvin. Lower numbers (2700K to 3000K) appear warm and yellow, like incandescent bulbs. Higher numbers (5000K to 6500K) appear cool and blue, like daylight.
Mismatched color temperatures make you look sickly. Warm overhead lights combined with cool desk lamps create an uneven skin tone that no camera can correct properly.
Aim for consistency. If your room has warm ambient lighting, use a warm key light. If you have lots of natural daylight, match it with daylight-balanced bulbs around 5000K to 5500K.
Most people look best in light between 4500K and 5500K. It’s neutral enough to render skin tones accurately without looking too clinical or too cozy.
Check your light’s CRI (Color Rendering Index) if you’re buying new equipment. A CRI above 90 means colors will look natural and accurate on camera.
Common lighting mistakes that sabotage your video presence
Backlighting is the most frequent error. Sitting in front of a window turns you into a dark blob, forcing your camera to choose between exposing your face or the bright background.
Overhead-only lighting creates the “horror movie” effect. Shadows pool in your eye sockets and under your nose, making you look exhausted regardless of how well-rested you actually are.
Colored or tinted lighting throws off skin tones. That trendy pink desk lamp might look great in person but makes you appear sunburned on camera.
Inconsistent lighting between calls confuses your colleagues. Natural light changes throughout the day, so relying solely on window light means you look different in morning versus afternoon meetings.
Laptop screens as fill lights create an eerie blue glow from below. It’s better than nothing, but it’s not flattering. Your screen should not be your primary light source.
Building a budget-friendly lighting setup that actually works
You don’t need expensive equipment. A $30 ring light solves 80% of lighting problems for most remote workers.
Here’s a practical setup for under $100:
- Get a basic LED ring light or panel with adjustable brightness and color temperature.
- Position it at eye level, 12 to 18 inches from your face, angled slightly to one side.
- Add a small fill light on the opposite side (even a desk lamp with a white shade works).
- Use a white poster board or foam core as a reflector to bounce light and reduce shadows.
- Test your setup during an actual video call and adjust based on what you see.
For those willing to invest more, a quality LED panel light ($60 to $150) with a diffusion panel provides more even, professional-looking illumination than a ring light.
Some professionals prefer two smaller LED panels positioned at 45-degree angles on either side of their camera. This creates beautiful, even lighting without the circular catchlight that ring lights produce in your eyes.
Natural light strategies for different times of day
Morning light from an east-facing window provides soft, warm illumination. Position your desk so you face the window, using it as your key light.
Midday sun can be harsh and create strong shadows. Diffuse it with sheer curtains or position yourself slightly away from the window, using it as ambient fill rather than your primary source.
Afternoon light from west-facing windows can be golden and flattering, but it changes rapidly. Have artificial lighting ready to supplement as the sun moves.
Overcast days provide beautifully diffused natural light. It’s actually ideal for video calls because it’s soft and even, without harsh shadows or bright spots.
North-facing windows (in the Northern Hemisphere) provide consistent, neutral light throughout the day. They’re the most reliable natural light source for remote workers.
How to manage your background and environment
Your lighting setup affects your entire visible space, not just your face. A well-lit face against a dark, murky background looks disconnected and unprofessional.
Add ambient lighting behind you. A floor lamp or desk lamp in the background adds depth and prevents your background from falling into darkness.
Separate yourself from the wall. Sitting too close to your background creates a flat, cramped appearance. Move forward 3 to 4 feet if space allows.
Consider a subtle backlight. A small LED strip or lamp behind and to the side creates a rim of light that separates you from your background, adding a professional polish.
Match your background lighting to your key light’s color temperature. Mixed temperatures create visual confusion and make your video feed look amateurish.
Testing and adjusting your lighting setup
What looks good to your eye might not translate well on camera. Always test your lighting during an actual video call, not just by looking in a mirror.
Join a test meeting or record yourself. Watch the playback and look for:
- Dark shadows under your eyes, nose, or chin
- Overexposed bright spots on your forehead or cheeks
- Uneven skin tones or color casts
- Harsh lines between light and shadow
- Background that’s too dark or distractingly bright
Make small adjustments and test again. Move your light closer or farther away. Adjust the angle. Change the brightness or color temperature.
Different video platforms process light differently. Zoom, Teams, and Google Meet all have slightly different auto-exposure algorithms. Test on the platforms you use most frequently.
Advanced techniques for specific scenarios
Client presentations require extra polish. Add a subtle backlight and ensure your background is well-lit and professional. Consider using a higher-quality external camera positioned at eye level.
Team stand-ups can be more casual, but consistent lighting helps. Your colleagues see you daily, so dramatic changes in your appearance from varying natural light can be distracting. For more on making these meetings effective, check out the 15-minute remote stand-up.
Recording presentations or training videos demands careful attention to lighting consistency. Use artificial lights exclusively so your appearance doesn’t change as you record over multiple sessions.
Late-night calls with international colleagues require full artificial lighting since natural light isn’t available. This is where having a reliable, adjustable LED setup becomes essential.
Lighting considerations for different skin tones
Darker skin tones require more light to register properly on camera. Most webcams are optimized for lighter skin, so you may need to increase your key light intensity by 30% to 50%.
Avoid extremely cool lighting (above 6000K) on darker skin, as it can create an ashy appearance. Warmer temperatures (4500K to 5000K) generally render darker skin tones more accurately.
Very fair skin can wash out easily under intense lighting. Start with lower intensity and increase gradually. Position lights slightly farther away to reduce the risk of overexposure.
Everyone benefits from soft, diffused light rather than harsh direct light. Use diffusion panels, bounce light off walls or ceilings, or choose lights with built-in diffusers.
Portable lighting solutions for hybrid workers
Coworking spaces and hotel rooms present lighting challenges. You can’t control the environment, but you can bring your own light.
A compact, foldable ring light fits in most laptop bags. Look for models that clip onto your laptop screen or stand on the desk beside you.
Small LED panel lights with rechargeable batteries work anywhere. They’re more discreet than ring lights and easier to position in tight spaces.
A collapsible reflector (white on one side, silver on the other) weighs almost nothing and can dramatically improve your lighting by bouncing available light onto your face.
For professionals who frequently work from coworking spaces with meeting room technology, having portable lighting ensures consistency across locations.
Troubleshooting common lighting problems
Problem: You look washed out and pale.
Solution: Reduce light intensity or move your key light farther away. Check that your color temperature isn’t too cool.
Problem: Heavy shadows under your eyes.
Solution: Raise your key light or add a fill light from below. A white reflector on your desk can bounce light upward.
Problem: One side of your face is much brighter than the other.
Solution: Add fill lighting on the darker side or adjust your key light to be more centered.
Problem: Your skin tone looks orange or blue.
Solution: Adjust color temperature. If your light is too warm (orange), increase the Kelvin. If too cool (blue), decrease it.
Problem: Lighting looks great at 9am but terrible by 3pm.
Solution: Reduce reliance on natural light. Use artificial lighting as your key source and natural light as fill.
Equipment recommendations by budget level
| Budget Level | Key Light | Fill Light | Additional Gear | Total Cost |
|---|---|---|---|---|
| Starter | Desk lamp with daylight bulb | Window or white poster board | None | $15-30 |
| Basic | 10-inch ring light with stand | Desk lamp opposite side | None | $30-60 |
| Intermediate | LED panel light with diffuser | Second smaller LED panel | Reflector | $100-200 |
| Professional | Two LED panels with stands | Adjustable backlight | Diffusion panels, reflectors | $300-500 |
Most remote workers find the intermediate level provides the best balance of results and investment. You get professional-looking lighting without the complexity or cost of a full studio setup.
Integrating lighting with your complete home office setup
Lighting works best as part of a cohesive workspace design. Your camera, microphone, desk position, and background all interact with your lighting choices.
Position your camera at eye level, not looking up from your laptop. This changes the angle at which light hits your face and affects shadow placement.
Your desk height and chair position affect how light falls on you. Adjustable furniture helps you maintain consistent positioning relative to your lights. Learn more about building a home office that actually boosts productivity.
Background elements can reflect or absorb light. White walls bounce light and brighten your space. Dark walls absorb light and may require additional background illumination.
Your monitor’s brightness affects how your camera exposes your face. An extremely bright screen can fool your camera into underexposing you. Reduce screen brightness during calls if needed.
Seasonal and time zone adjustments
Winter means less natural light and shorter days. You’ll rely more heavily on artificial lighting, even for afternoon meetings.
Summer brings longer days but also harsher midday sun. Invest in good diffusion solutions for your windows or plan your workspace to avoid direct sunlight during peak hours.
Working with global teams means calls at unusual hours. If you’re taking calls at 6am or 10pm, natural light isn’t an option. A reliable artificial lighting setup becomes non-negotiable.
Daylight saving time changes can affect your lighting setup twice a year. A window that provided perfect morning light suddenly delivers harsh afternoon sun, or vice versa. Be prepared to adjust.
The psychology of good lighting in virtual meetings
People make snap judgments based on video appearance. Good lighting signals professionalism, preparation, and respect for your colleagues’ time.
Poor lighting can make you seem disengaged or unprepared, even when you’re fully present and contributing valuable ideas.
Consistent, flattering lighting reduces self-consciousness. When you’re not worried about how you look, you can focus on the actual meeting content.
Good lighting also reduces the fatigue that comes from extended video meetings. When you look better, you feel better, and the psychological burden of being on camera decreases.
“The difference between adequate lighting and great lighting is the difference between looking like you showed up and looking like you’re in charge. It’s a small investment that pays dividends in every virtual interaction.” — Remote work consultant specializing in executive presence
When to upgrade your lighting setup
Start simple and upgrade based on actual needs, not perceived ones. If your current setup works for team meetings but you’re starting to do client presentations, that’s a good time to invest more.
Recording video content requires better lighting than live calls. If you’re creating training materials or marketing videos, upgrade to more controllable, professional equipment.
If you’ve addressed camera quality, audio, and background but still feel unprofessional on video, lighting is likely the missing piece.
When colleagues or clients comment positively on your video quality, you’ve found the right setup. When they ask what equipment you use, you know you’ve exceeded expectations.
Making lighting work in challenging spaces
Small apartments with limited natural light need creative solutions. LED strips along the ceiling or behind your monitor can provide ambient fill without taking up desk space.
Shared spaces where you can’t leave equipment set up require portable solutions. Clip-on ring lights and compact LED panels that pack away easily are your friends.
Rooms with mixed lighting (some windows, some overhead lights, some lamps) need careful balancing. Use artificial lights that match your ambient color temperature and position them to complement, not fight, existing light sources.
Basements or windowless rooms give you complete control but require full artificial lighting. This is actually easier to manage than mixed lighting because you’re not fighting changing natural light throughout the day.
Maintaining your lighting equipment
LED lights last for years but accumulate dust that reduces brightness and creates uneven illumination. Wipe down your lights monthly with a soft, dry cloth.
Check connections and stands regularly. A wobbly light that shifts position between meetings defeats the purpose of a consistent setup.
Replace bulbs before they burn out completely. Most LEDs dim gradually over time. If you notice your lighting seems less effective than when you first set it up, your bulbs may be aging.
Store portable lighting properly when traveling. Protect diffusion panels and reflectors from creasing or tearing. A small padded case prevents damage and keeps everything organized.
Your lighting setup reflects your professional standards
The way you appear on camera isn’t vanity. It’s professional communication.
Good lighting for video calls demonstrates that you take remote work seriously. It shows respect for your colleagues and clients. It removes visual distractions so people can focus on your ideas instead of your shadows.
Start with one good light source positioned correctly. Add fill lighting as needed. Test and adjust until you look like the professional you are.
Your next video call is an opportunity to show up at your best. Make sure your lighting setup supports that goal.