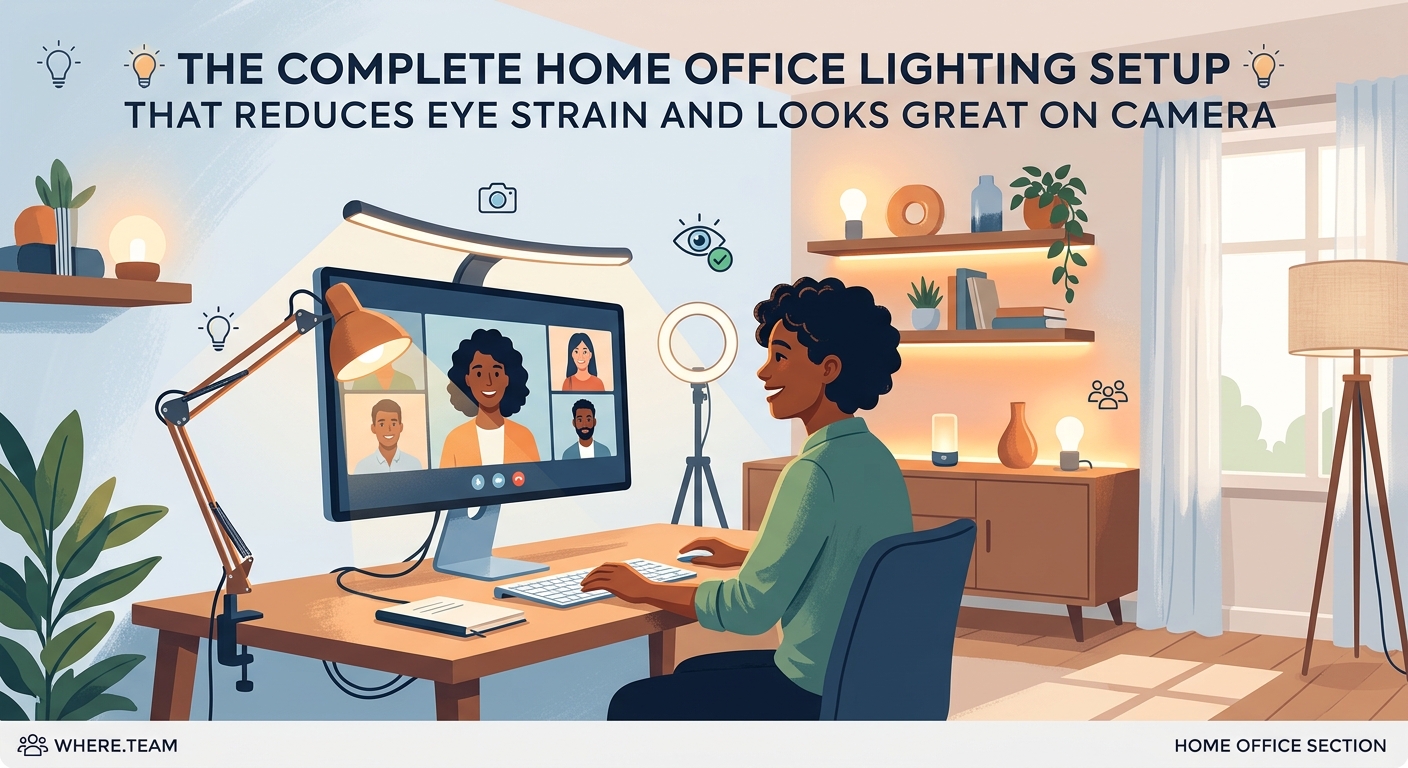
Your eyes shouldn’t hurt at 3 PM. If they do, your lighting is probably wrong. Most remote workers blame screen time for headaches and fatigue, but the real culprit is often the light around their monitor. Bad lighting forces your eyes to work harder, causes glare on your screen, and makes you look washed out or shadowy on video calls. The good news? Fixing it doesn’t require an interior designer or a huge budget.
A proper home office lighting setup combines three layers: ambient light for overall brightness, task lighting at your desk, and bias lighting behind your monitor. Use 5000K to 6500K daylight bulbs to match natural light, position lights to eliminate screen glare, and add a key light at eye level for video calls. This setup reduces eye strain and improves your on-camera appearance.
Why Your Current Lighting Is Causing Eye Strain
Most home offices have one overhead light and a window. That’s it.
This creates massive problems. Overhead lights cast shadows on your workspace and create uneven brightness. Windows introduce glare that changes throughout the day. Your monitor becomes a bright rectangle in a dim room, forcing your pupils to constantly adjust.
This constant adjustment is what causes eye strain. Your eyes are muscles. When they work overtime to adapt to changing light levels, they get tired. Add eight hours of screen time, and you get headaches, dry eyes, and that gritty feeling by mid-afternoon.
The contrast problem gets worse on video calls. A window behind you turns you into a silhouette. A lamp beside your monitor creates harsh shadows on one side of your face. You end up looking unprofessional even though you’re saying all the right things.
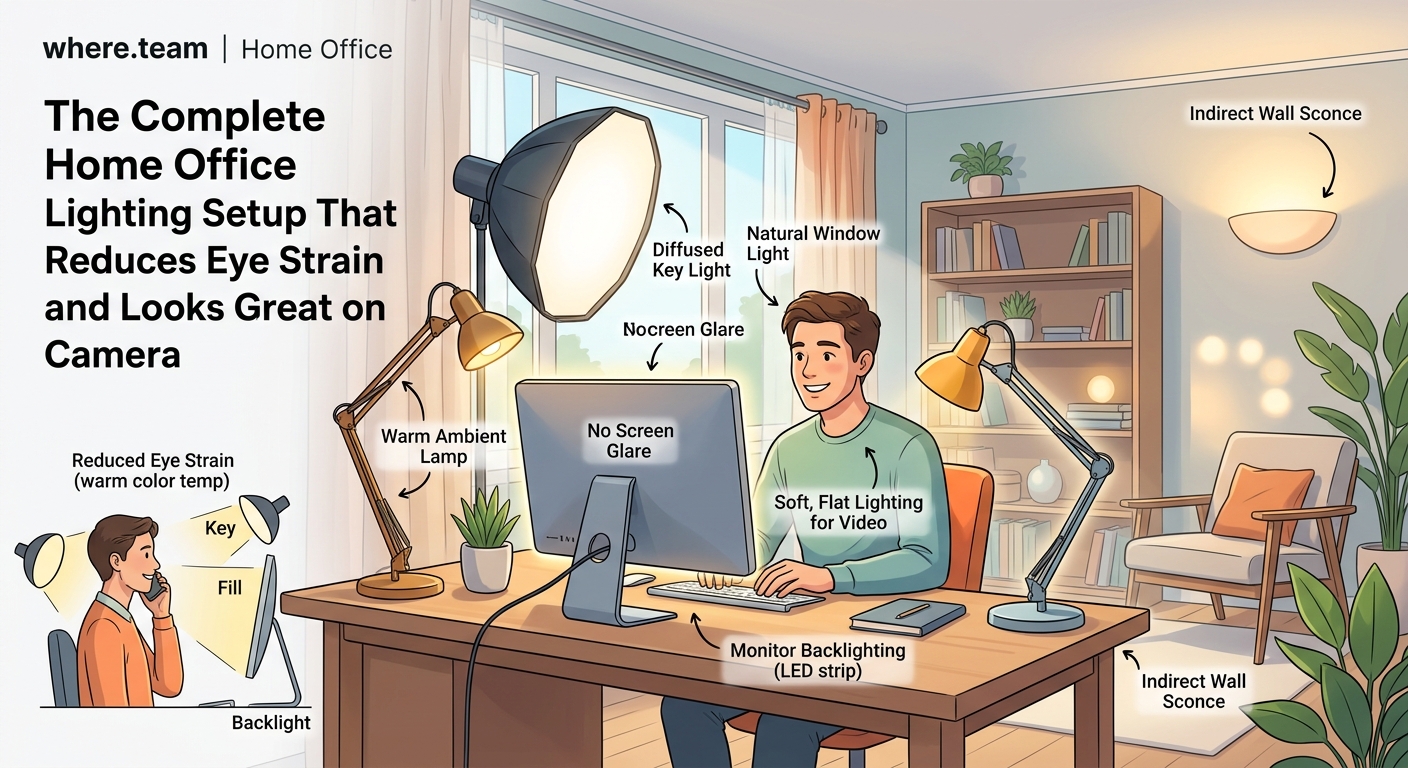
The Three-Layer Lighting System That Actually Works
Professional photographers use a three-point lighting system. You don’t need all three points, but you do need three layers.
Ambient lighting fills the room with general brightness. This prevents your monitor from being the brightest thing in your field of vision. Aim for soft, even light that matches your screen brightness.
Task lighting illuminates your desk surface. This matters if you take notes, read documents, or work with physical materials. It should be bright enough to see clearly but not so bright it reflects off your screen.
Bias lighting sits behind your monitor. This is the secret weapon most people miss. A light strip on the back of your display reduces the contrast between your bright screen and the wall behind it. Your eyes don’t have to work as hard.
Here’s how to set up each layer:
- Replace overhead bulbs with daylight spectrum LEDs (5000K to 6500K). These match natural light and reduce the yellow cast that makes you feel drowsy.
- Add a desk lamp with adjustable brightness on the opposite side of your dominant hand. If you’re right-handed, put it on the left. This prevents shadows when you write.
- Install an LED strip behind your monitor. USB-powered strips work great and don’t require extra outlets.
Choosing the Right Color Temperature for All-Day Comfort
Color temperature matters more than most people realize. Measured in Kelvin, it determines whether light feels warm or cool.
Warm light (2700K to 3000K) has a yellow or orange tint. It’s cozy for living rooms but makes you sleepy during work hours. Cool light (5000K to 6500K) mimics midday sunlight and keeps you alert.
For a home office lighting setup that reduces eye strain, stick with daylight spectrum bulbs. They render colors accurately, which matters if you work with design, photos, or video. They also suppress melatonin production during the day, helping you maintain a normal sleep schedule.
Avoid mixing color temperatures in the same room. If your overhead light is warm and your desk lamp is cool, your brain gets confused. Everything should match.
“The biggest mistake I see remote workers make is using whatever bulbs came with their fixtures. Spending $20 on the right color temperature bulbs will do more for your comfort than a $200 ergonomic chair.” — Lighting designer with 15 years of experience in workspace optimization
How to Position Lights to Eliminate Screen Glare
Glare happens when light bounces off your screen into your eyes. It reduces contrast, makes text harder to read, and forces you to squint.
The fix is positioning. Never put a light source directly behind your monitor or directly in front of you. Both create reflections on the screen.
Place your desk perpendicular to windows. This gives you natural light from the side without glare. If that’s not possible, use blackout curtains or blinds you can adjust throughout the day.
Position your desk lamp at a 45-degree angle to your workspace. It should light your desk surface without hitting your screen. If you see a reflection of the bulb on your monitor, move the lamp.
For overhead lighting, diffused fixtures work better than bare bulbs. Frosted covers or lampshades spread light evenly and reduce harsh spots.
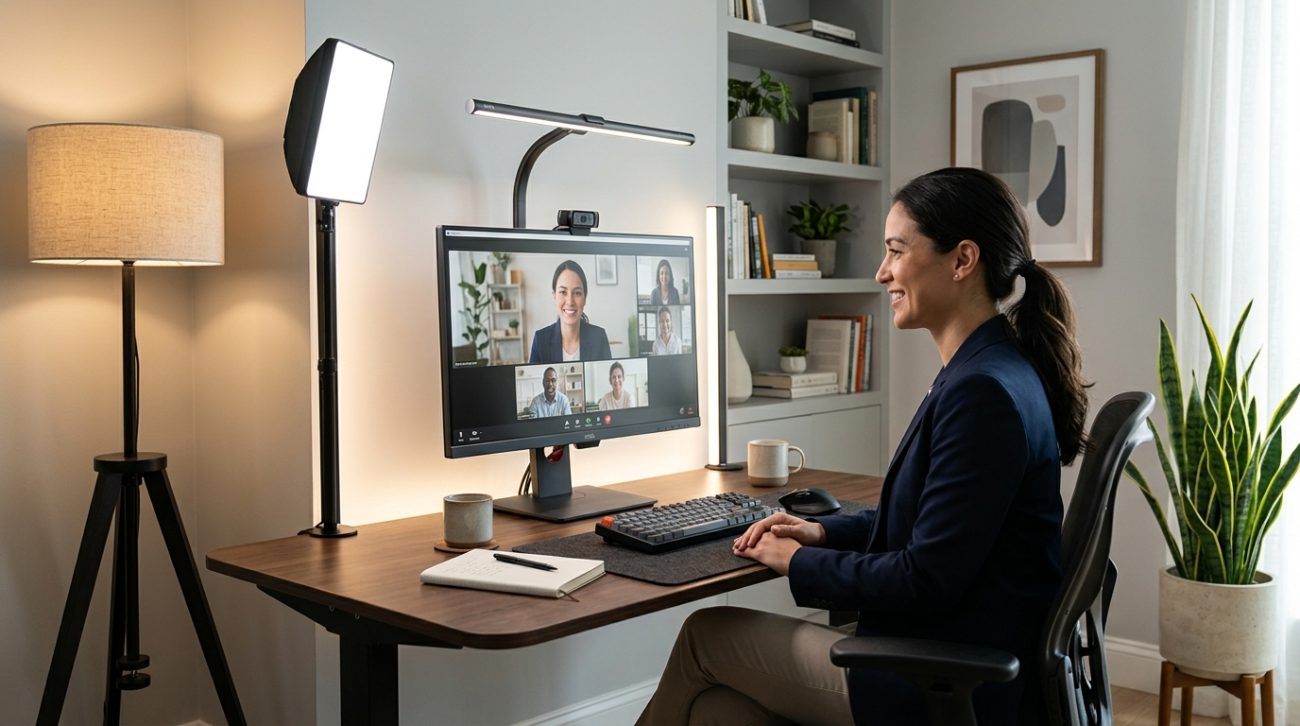
Setting Up Key Lighting for Video Calls
Looking good on camera requires one additional light: a key light at eye level.
This is your main light source during video calls. It should be positioned in front of you, slightly above your monitor, angled down at your face. This creates even illumination without harsh shadows.
Ring lights became popular during the pandemic for good reason. They provide soft, flattering light and eliminate shadows under your eyes. But you don’t need a ring light specifically. Any adjustable LED panel works.
The key is distance and angle. Place the light 1 to 2 feet from your face. Too close and you’ll look washed out. Too far and it won’t make a difference. Angle it down about 15 degrees to avoid the “interrogation room” look.
Brightness matters too. Your face should be slightly brighter than the background but not glowing. Most LED panels have dimmers. Start at 50% and adjust until you look natural on camera.
If you’re dealing with why your remote meetings feel exhausting and how to fix zoom fatigue, better lighting helps. When you look professional and feel comfortable, meetings drain less energy.
The Lighting Mistakes That Make Eye Strain Worse
| Mistake | Why It Hurts Your Eyes | Better Approach |
|---|---|---|
| Single overhead light | Creates uneven brightness and shadows | Add task lighting and bias lighting |
| Monitor brighter than room | Forces constant pupil adjustment | Match ambient light to screen brightness |
| Window directly behind monitor | Causes glare and contrast issues | Position desk perpendicular to windows |
| Warm yellow bulbs | Reduces alertness and color accuracy | Use 5000K to 6500K daylight bulbs |
| Lights reflecting on screen | Reduces contrast and readability | Position lights at 45-degree angles |
| No lighting behind monitor | Increases contrast between screen and wall | Add LED strip bias lighting |
Budget-Friendly Lighting Solutions That Actually Work
You don’t need to spend hundreds of dollars. Here’s what matters:
- LED desk lamp with adjustable brightness: $25 to $40
- USB LED strip for bias lighting: $10 to $15
- Daylight spectrum LED bulbs for existing fixtures: $15 for a 4-pack
- LED panel for video calls (optional): $30 to $60
Total cost for a complete setup: $50 to $130.
Compare that to the cost of eye strain: headaches, reduced productivity, and potential vision problems down the road. The return on investment is immediate.
Look for lamps with multiple brightness levels. You’ll want different settings for morning, afternoon, and evening work. Dimmable lights let you adjust as natural light changes throughout the day.
Avoid cheap LED strips that flicker. Flickering isn’t always visible to the naked eye, but it causes eye fatigue. Read reviews and stick with brands that specifically mention flicker-free operation.
Adjusting Your Setup Throughout the Day
Your lighting needs change as the sun moves. What works at 9 AM might cause glare by 2 PM.
Morning light comes from the east. If your window faces that direction, you might need to close curtains or blinds until late morning. Afternoon sun is brightest and causes the most glare. This is when bias lighting becomes critical.
Evening work requires different settings. As natural light fades, increase your ambient lighting to maintain consistent brightness. Your eyes shouldn’t have to adjust dramatically when the sun sets.
Some people prefer warmer light in the evening to signal their brain that the workday is ending. If you work past 6 PM regularly, consider a second set of bulbs or smart bulbs that change color temperature on a schedule.
Your workspace setup matters beyond lighting. If you’re also thinking about how to build the ultimate standing desk setup for remote work, proper lighting should be part of that plan.
What About Blue Light Filters and Screen Settings?
Blue light gets blamed for everything. The truth is more nuanced.
Blue light does suppress melatonin, which can interfere with sleep if you’re staring at screens before bed. But during work hours, that’s actually helpful. It keeps you alert.
The bigger issue is brightness and contrast. A screen that’s too bright in a dim room causes more eye strain than blue light ever will. Match your screen brightness to your ambient lighting.
Most operating systems have night mode or blue light filters. These shift your display toward warmer colors in the evening. Use them if you work late, but don’t rely on them to fix bad lighting.
Screen position matters too. Your monitor should be at arm’s length, with the top of the screen at or slightly below eye level. This reduces neck strain and keeps your eyes in a comfortable position.
Creating a Lighting Setup That Works for Hybrid Schedules
If you split time between home and a coworking space, consistency matters. Your eyes adapt to your usual lighting conditions. Switching between drastically different setups causes fatigue.
Many coworking spaces with the best meeting room technology for virtual-first teams have professional lighting built in. Pay attention to what works there and replicate it at home.
Portable lighting makes this easier. A small LED panel that fits in a laptop bag gives you consistent key lighting wherever you work. USB-powered bias lights work anywhere with a computer.
If you’re comparing day passes vs monthly memberships which coworking option makes sense for hybrid teams, factor in lighting quality. A space with terrible overhead fluorescents will tire your eyes faster than working from home with proper setup.
Testing and Tweaking Your Setup
You won’t get everything perfect on day one. Plan to adjust.
Work for a full day with your new lighting. Notice when your eyes feel tired. Check your appearance on a video call at different times of day. Take a photo of your workspace in the morning and afternoon to see how natural light affects your setup.
Common signs your lighting still needs work:
- Squinting to read text on your screen
- Headaches that start in the afternoon
- Needing to adjust screen brightness multiple times per day
- Looking too dark or too bright on video calls
- Reflections or glare on your monitor
Each symptom points to a specific fix. Squinting means your screen is too dim relative to the room. Afternoon headaches suggest your ambient light isn’t keeping up with changing natural light. Glare means you need to reposition a light source or window covering.
Keep a small notebook on your desk for the first week. When something bothers your eyes, write down the time and what you notice. Patterns will emerge.
Making Your Home Office Lighting Setup Last
LED bulbs last 15,000 to 50,000 hours. At 8 hours per day, that’s 5 to 17 years. Your initial investment will serve you for a long time.
Clean your light fixtures every few months. Dust reduces brightness and changes color temperature. A microfiber cloth takes 30 seconds per fixture.
If you move or rearrange your office, reassess your lighting. A setup that worked in one room might not work in another. Window positions change. Wall colors affect how light reflects.
Smart bulbs offer convenience if you want to automate brightness and color temperature throughout the day. They cost more upfront but eliminate manual adjustments. Most work with voice assistants or phone apps.
The principles stay the same regardless of your budget or space. Three layers of light. Daylight spectrum bulbs. Positioning that eliminates glare. Brightness that matches your screen.
Your Eyes Will Thank You
Lighting isn’t glamorous. Nobody brags about their desk lamp. But it’s one of the few workspace improvements that pays dividends every single day.
Your eyes work hard. They deserve conditions that don’t make their job harder. A proper home office lighting setup reduces eye strain, prevents headaches, and makes you look professional on camera. It costs less than a fancy keyboard and matters more than most productivity apps.
Start with bias lighting behind your monitor. Add a desk lamp. Replace your overhead bulbs. Make small changes and notice the difference. Your 3 PM self will appreciate it.